Showing posts with label Daring Bakers. Show all posts

2009-07-27

Milan Cookies

The July Daring Bakers' challenge was hosted by Nicole at Sweet Tooth. She chose Chocolate Covered Marshmallow Cookies and Milan Cookies from pastry chef Gale Gand of the Food Network.
This month's challenge offered the choice of adapting one or both of two delicious cookies. Time constraints and generalized chaos made the decision for me, leading to one elegant, deceptively simple confection.
The original recipe was similar to the previous Daring Bakers Tuiles challenge/debacle, so instead of trying to pipe the dough, I made a sugar cookie variation:
Wet Ingredients:

1/4 C plain soymilk + 3/4 tsp lemon juice

1/2 C dairy free margarine, softened (Earth Balance, as usual)

1 C powdered sugar

2 Tbs vanilla extract

Dry Ingredients:

2 C all-purpose flour

1/2 tsp baking soda

1/4 tsp table salt

Additional:

granulated sugar for dipping

Mix soymilk and lemon juice in a nonreactive container, i.e. Pyrex measuring cup, and set aside. Sift dry ingredients together in a small bowl and set aside. Cream margarine and sugar together in a mixing bowl until fluffy. Add soymilk mixture and vanilla, then beat until combined. (Don't worry if it develops a cottage cheese texture.) Continue to beat while gradually adding the flour mixture until completely combined.
Stretch out a three foot sheet of cling wrap on the counter. Turn dough out onto the wrap and carefully work into a cylindrical shape about 1 inch in diameter. Roll in the cling wrap and place in refrigerator overnight.
Preheat oven to 350°F. Line cookie sheets with parchment paper. Unwrap dough and cut into 1/4 inch slices. Dip one side of cookie in granulated sugar, and place on cookie sheets two inches apart with sugar side up. After filling cookie sheet, use a glass with a concave bottom to flatten cookies. Bake 8-10 minutes.
Cookie Filling:
1/4 C coconut milk

2/3 C Enjoy Life Chocolate Chips

half of the zest from one orange.

Place zest and chocolate chips in a small bowl. Heat coconut milk in microwave until bubbling. Stir coconut milk into chips and zest until smooth, fragrant, chocolaty mixture achieved. Resist urge to bypass cookies and stuff directly in face.
Commence with the sandwich making. Match up the cookies into pairs and spackle them together with orange chocolate decadence. They hold a surprising amount of filling without squishing out.

The result wasn't quite as delicate as the original Pepperidge Farm Milanos, but these cookies are worth the effort. Thanks to Nicole for great challenge!

2009-06-27

The Daring Tarts Bake a Pudding Well

Or was it the Bakers Heart a Daring Wedding? To call the name confusing is pudding it mildly. In any case...
The June Daring Bakers' challenge was hosted by Jasmine of Confessions of a Cardamom Addict and Annemarie of Ambrosia and Nectar. They chose a Traditional (UK) Bakewell Tart... er... pudding that was inspired by a rich baking history dating back to the 1800's in England.
This Bakewell pastry is made up of three components, a shortcrust pastry, fruit preserves, and frangipane. The charming tarts, I mean hostesses, strongly urged making the crust the traditional way by hand. Modifying recipes to accommodate multiple food allergies is akin to baking without a net, so I make no apologies for any little advantage I could squeeze from my appliances after I replaced all the butter, eggs, almond extract, almond meal, and almonds. (You can see the original recipe here.)
Sweet Shortcrust Pastry:
1 3/4 C all purpose flour
2 Tbs granulated sugar
1/2 tsp salt
1/2 C nondairy margarine*, cold
3-4 Tbs cold water
*Note: one of the reasons I like to use Earth Balance is because it doesn't taste salty like some other nondairy margarines do. If you use a different margarine, you may want to reduce the amount of salt in the pastry.
Combine flour, sugar, and salt in a food processor. Give a spin to mix. Cut margarine into small pieces and add. Whiz again until mixture forms into crumbs. (You may need to stop to scrape down the sides.) While mixing, slowly add cold water until dough forms a ball. Shape into a disk, wrap up in plastic wrap, and place in fridge for at least half an hour.
The fruit component for my Bakewell Tart was homemade raspberry jam supplied by my mom, who traditionally makes jam and jellies for most of our very grateful family. I'd say she was very well preserved, but she might squish me.
The frangipane, based on butter, eggs, and ground almonds, called for a great deal of creativity to adapt, but in the end I reached for two of my favorite subs, soy yogurt to make up the bulk from the egg and ground flax seed both to bind the mixture and give it some nuttiness. (I also adjusted the amount of ground flax seed and flour.) Plus I added a little baking powder to get some rise and keep it from being too dense.
Frangipane:
1/2 C nondairy margarine, softened
1 C powdered sugar
3/4 C soy yogurt
1 tsp vanilla extract
1/2 C all purpose flour (increase to 1 C)*
1/4 C ground flax seed
1/2 tsp baking powder
*Note: I reversed the proportions of flour to flax seed and calculated the amount of flour at one Cup, but I liked the way the mixture looked at half a Cup of flour so much, that I stopped. The "Frangepane" was still wet in the middle after baking, so the initial calculation was right.
Cream the margarine and powdered sugar together until pale and fluffy. Add the soy yogurt and vanilla extract while continuing to mix. Ignore the resulting cottage cheese texture. It'll be just fine, I promise. Sift together the flour, flax seed, and baking powder, then mix them in, as well. See how nice and smooth it gets? Take a deep breath and get ready to assemble your masterpiece.
Start by taking your disk of shortcrust dough and rolling it out on a well floured surface to 1/4" thick. The Tarts recommend rolling in one direction (away from you,) then giving the dough a quarter turn and repeating. That worked well until the circle became larger, at which point I began turning the rolling pin. The recipe calls for a 9" fluted tart pan. To my chagrin, I discovered at this late stage that I am the proud owner of an 8" and and 11" pan. It's a good thing the extra dough can be used to make cookies!
After transferring the dough to the tart pan, trim the extra and put it in the freezer for 15 minutes. Preheat oven to 400F at during this time. Remove shell from freezer and spread 1/2 to 1 C of jam as evenly as possible. The jam may need to be warmed to spread well. Gently turn out Frangipane mixture into tart pan, and smooth with an icing spatula. The original recipe calls for almonds sprinkled on the crust toward the end of the baking period. I sprinkled some raw sugar on at this stage instead to give it a little sparkle. Bake for thirty minutes.
The tart wasn't perfect, since it was a little pudding like in the center, but that's attributable to the smaller pan and thicker frangipane, as well as the shortage of flour. Thanks to Jasmine and Annemarie for a great challenge, and be sure to check out all the other Daring Bakers!

2009-05-27

Apple Strudel

The May Daring Bakers’ challenge was hosted by Linda of make life sweeter! and Courtney of Coco Cooks. They chose Apple Strudel from the recipe book Kaffeehaus: Exquisite Desserts from the Classic Cafés of Vienna, Budapest and Prague by Rick Rodgers.
I was really thrilled by this challenge, partly because it's a truly lovely pastry that I've never attempted before, and partly because it required absolutely minimal adjustments to make it allergy friendly. I substituted Earth Balance for the butter and crunchy homemade granola for the walnuts with delicious results.

Apple strudel from Kaffeehaus – Exquisite Desserts from the Classic Cafés of Vienna, Budapest and Prague by Rick Rodgers

Filling:
2 tablespoons (30 ml) golden rum
3 tablespoons (45 ml) raisins
1/4 teaspoon ground cinnamon
1/3 cup plus 1 tablespoon (80 g) sugar
1/2 cup (1 stick / 115 g) nondairy margarine, divided
1 1/2 cups (350 ml) fresh bread crumbs (I used potato bread)
strudel dough (recipe below)
1/2 cup (120 ml, about 60 g) granola to substitute for walnuts (recipe below)
2 pounds (900 g) tart cooking apples, peeled, cored and cut into ¼ inch-thick slices (use apples that hold their shape during baking)

1. Mix the rum and raisins in a bowl. Mix the cinnamon and sugar in another bowl.
2. Heat 3 tablespoons of the margarine in a large skillet over medium-high. Add the breadcrumbs and cook whilst stirring until golden and toasted. This will take about 3 minutes. Let it cool completely.
3. Put the rack in the upper third of the oven and preheat the oven to 400°F (200°C). Line a large baking sheet with baking paper (parchment paper). Make the strudel dough as described below. Spread about 3 tablespoons of the remaining melted margarine over the dough using your hands (a bristle brush could tear the dough, you could use a special feather pastry brush instead of your hands). Sprinkle the buttered dough with the bread crumbs. Spread the granola about 3 inches (8 cm) from the short edge of the dough in a 6-inch-(15cm)-wide strip. Mix the apples with the raisins (including the rum), and the cinnamon sugar. Spread the mixture over the walnuts.
4. Fold the short end of the dough onto the filling. Lift the tablecloth at the short end of the dough so that the strudel rolls onto itself. Transfer the strudel to the prepared baking sheet by lifting it. Curve it into a horseshoe to fit. (I made a wreath instead.) Tuck the ends under the strudel. Brush the top with the remaining melted margarine.
5. Bake the strudel for about 30 minutes or until it is deep golden brown. Cool for at least 30 minutes before slicing. Use a serrated knife and serve either warm or at room temperature. It is best on the day it is baked.

Dough:
1 1/3 cups (200 g) unbleached flour
1/8 teaspoon salt
7 tablespoons (105 ml) water, plus more if needed
2 tablespoons (30 ml) vegetable oil, plus additional for coating the dough
1/2 teaspoon cider vinegar

1. Combine the flour and salt in a stand-mixer fitted with the paddle attachment. Mix the water, oil and vinegar in a measuring cup. Add the water/oil mixture to the flour with the mixer on low speed. You will get a soft dough. Make sure it is not too dry, add a little more water if necessary.
Take the dough out of the mixer. Change to the dough hook. Put the dough ball back in the mixer. Let the dough knead on medium until you get a soft dough ball with a somewhat rough surface.
2. Take the dough out of the mixer and continue kneading by hand on an unfloured work surface. Knead for about 2 minutes. Pick up the dough and throw it down hard onto your working surface occasionally.
Shape the dough into a ball and transfer it to a plate. Oil the top of the dough ball lightly. Cover the ball tightly with plastic wrap. Allow to stand for 30-90 minutes (longer is better).
3. It would be best if you have a work area that you can walk around on all sides like a 36 inch (90 cm) round table or a work surface of 23 x 38 inches (60 x 100 cm). Cover your working area with table cloth, dust it with flour and rub it into the fabric. Put your dough ball in the middle and roll it out as much as you can.
Pick the dough up by holding it by an edge. This way the weight of the dough and gravity can help stretching it as it hangs. Using the back of your hands to gently stretch and pull the dough. You can use your forearms to support it.
4. The dough will become too large to hold. Put it on your work surface. Leave the thicker edge of the dough to hang over the edge of the table. Place your hands underneath the dough and stretch and pull the dough thinner using the backs of your hands. Stretch and pull the dough until it's about 2 feet (60 cm) wide and 3 feet (90 cm) long, it will be tissue-thin by this time. Cut away the thick dough around the edges with scissors. The dough is now ready to be filled.

Granola:
1 1/2 C rolled oats
1/4 C sesame seeds
1/4 C ground flax seed
1/4 tsp cinnamon
1/4 C maple syrup

Preheat oven to 350F. Combine dry ingredients in a medium bowl, then stir in maple syrup. Spread onto a nonstick pan and bake for 30 minutes, stirring granola once halfway through. Remove from oven and allow to cool completely.

You'll notice this is a bare bones granola with no dried fruit, or anything else, to liven things up, but since I was trying to make a nut substitute, I kept it simple.

I had a little trepidation about making a huge sheet of paper thin dough, but the dough was a pleasure to work with, flexible and soft. Although my technique was clumsy, the area of my surface was the limiting factor in its final size. My strudel was a little thicker and shorter than it should have been, and I spontaneously made it into a circle, rather than a horseshoe shape. It was very pretty, but I found a puddle of liquid trapped in the center of my wreath when I pulled it from the oven. Despite draining it immediately, I still ended up with some soggy bottom crust. (Does this make me a baker of constant sorrow?) Still, this was one of my favorite challenges yet.
Be sure to check out all other Daring Bakers and their lovely strudels!
2009-04-27

Layered Cheesecake Indulgence


The April 2009 challenge is hosted by Jenny from Jenny Bakes. She has chosen Abbey's Infamous Cheesecake as the challenge.
Although this cheesecake comes to you as a Daring Bakers challenge, it began its career as a "Resolution Breaking Pie" for January's "You Want Pies With That?" challenge. Unfortunately, by the time I had a version that I would break just about any resolution to get my hands upon, it was too late to post. So this recipe sat in my half drafted posts, taunting me until I read these magic words :
The real challenge this month is to take this basic recipe and play with it. Make it unique. Make a showstopper of a dessert. Add flavor, sauces, decorations – dress it up and show it off. To be clear, I'm allowing for almost any flavor modification within the basic recipe (alcohol, lemon juice, vanilla), changes for dietary needs, and you can also experiment with the crust (graham crackers not essential). And then what you do on top - you have free reign here.
Well, then. Here it is.
I made the original cheesecake in a standard pie dish, but for the Daring Bakers challenge scaled it down to an 8" tart pan. I accidentally left out a few of the graham crackers for the crust, so it came out a bit thin and oily, but here are the correct quantities:
12 graham crackers
4 tsp turbinado sugar
1/3 C non dairy margarine, melted
Preheat oven to 350°F. Pulverize graham crackers in a food processor, then add sugar and margarine. Give the food processor another spin, then press the mixture into a 8" tart pan with the bottom of a round glass or a flat bottomed measuring cup. Press up along the sides with the side of the glass, using your fingers to even it out and keep it from going over the side of the pan. Once the crust mixture is evenly distributed, place the pan on a cookie sheet and bake the crust for 8 minutes. Allow the crust to cool to room temperature.
The first layer is made of cream cheese and sour cream. I prefer a higher ratio of sour cream, but The Kid doesn't care for the cheesecake when it's too sour, so I've scaled it back a bit. (If you bake this, feel free to adjust the proportions.)
3/4 C Tofutti Better Than Cream Cheese
1/4 C Tofutti Better Than Sour Cream
3 Tbs granulated sugar
1/2 vanilla bean (center only, I saved the pod to make vanilla sugar!)
2 tsp Ener-G Egg Replacer
In a small saucepan, mix all ingredients except the egg replacer over medium heat. Once they are combined, add the egg replacer, and stir until it starts to thicken. Pour into graham cracker crust, and set aside to cool.
This is followed by a thin raspberry layer:
1 C frozen raspberries
2 tsp granulated sugar
1 tsp corn starch
Defrost and mush up the raspberries. Push the liquid through a sieve. (Don't worry if some of the seeds make it through.) Whisk the raspberry liquid together with the sugar and corn starch in a small saucepan over medium heat until it starts to bubble. Remove from heat, then pour over cream cheese layer. If necessary spread with an offset spatula to cover entire area. Allow to cool to room temperature.

On the top is a final, luscious layer of chocolate ganache:
3/4 C Enjoy Life Chocolate Chips (suggest reducing to 1/2 C)
1/3 C coconut milk
1 Tbs dairy free margarine
Combine all three ingredients in a small saucepan and stir while gently warming over medium low heat until completely combined. Pour over raspberry layer, spreading with spatula if needed. Place finished cheesecake in refrigerator until chilled.
The result still needs some tweaking. I never thought I'd type these words, but I think that there might be too much chocolate on this cheesecake, and the chocolate layer is too firm compared to the cheesecake and raspberry. Reducing the quantity of chocolate chips to one half Cup, would probably put this cheesecake in the "this stuff should be illegal" territory.

(Apologies for the top of the stove photos. 'Fraid there wasn't time for any beauty shots!)

2009-04-04

Lasagne of Emilia-Romagna

I've taken a bit of an unplanned blogging break due to some family events, but the March Daring Bakers challenge has belatedly brought me back:
The March 2009 challenge is hosted by Mary of Beans and Caviar, Melinda of Melbourne Larder and Enza of Io Da Grande. They have chosen Lasagne of Emilia-Romagna from The Splendid Table by Lynne Rossetto Kasper as the challenge.
Making homemade egg-free pasta has been one of my back burner projects, so I was very excited to try adapting this Spinach Pasta, which is layered with a Bechamel Sauce and a Country Style Ragu.

Spinach Pasta:
10 oz frozen chopped spinach, defrosted and squeezed completely dry
3/4 C water
1/4 C olive oil
3 1/2 C AP flour
1/2 tsp salt
Combine the spinach, water, and olive oil a food processor, and pulverize until smooth. Sift flour and salt together into a mixing bowl. Stir in spinach mixture and knead (by hand or machine) until smooth and elastic. Add additional flour or water if necessary. Wrap in plastic wrap and allow to relax at room temperature for three hours. With a pasta machine, roll out into paper thin sheets, cut to approximately 4" by 8". (You'll need plenty of flour to keep from sticking.) Use immediately or set aside and allow to dry.

For the Bechamel, I would have preferred an alternative to soymilk (to avoid the aftertaste) or coconut milk (to avoid the fat.) Since inspiration didn't strike and the lasagne was filled with plenty of other strong flavors, I went ahead with the soymilk, and was very happy with the sauce once it was integrated into the dish.
Bechamel Sauce:
1/4 C dairy free margarine (Earth Balance, as usual)
1/4 C AP flour, sifted
2 2/3 C soymilk
salt and freshly ground white pepper to taste
freshly grated nutmeg to taste
Melt margarine in a medium saucepan over medium low heat. Mix in flour and stir while cooking for three minutes. Gradually whisk in soymilk, keeping the mixture smooth. Bring to a simmer and continue to stir while sauce thickens, about five minutes. Season to taste.
The original Ragu included pancetta, veal, pork loin or sausage, beef skirt steak, and prosciutto. Although the challenge allowed for freedom in making the sauces, I decided to try to stay as close as possible to the original while substituting poultry for the meat.
Country Style Ragu:
3 Tbs olive oil
6 slices turkey bacon, divided (4 slices minced)
1 medium onion, minced
1 medium stalk celery with leaves, minced
1 small carrot, minced
1/2 lb ground turkey sausage
1 pound turkey thigh meat
2/3 C dry red wine
2 1/2 C turkey stock (from my frozen Thanksgiving batch)
1 C soymilk
1 can plum tomatoes, drained
salt and freshly ground pepper to taste
Heat olive oil in a large skillet over medium high heat. Add minced turkey bacon and vegetables and cook until soft, about ten minutes. Combine remaining meats in food processor and grind together. (I will be very happy to never put raw meat in my food processor again.) Stir into pan and cook until all pink is gone, about fifteen minutes. Remove mixture from pan in order to deglaze.
Add the wine to the skillet, lowering the heat so the sauce bubbles quietly. Stir occasionally until the wine has reduced by half, about 3 minutes. Scrape up the brown glaze as the wine bubbles. Then pour the reduced wine into the saucepan and set the skillet aside. Stir ½ cup stock into the saucepan and let it bubble slowly, 10 minutes, or until totally evaporated. Repeat with another ½ cup stock. Stir in the rest of the stock along with the milk. Adjust heat so the liquid bubbles very slowly. Partially cover the pot, and cook 1 hour. Stir frequently to check for sticking.
Add the tomatoes, crushing them as they go into the pot. Cook uncovered, at a very slow bubble for another 45 minutes, or until the sauce resembles a thick, meaty stew. Season with salt and pepper.

The original instructions called for the lasagna noodles to be cooked before layered into a pan, but I discovered that removing the paper thin leaves from a pot of boiling water was like trying to grasp a jellyfish. Once they came from the pot, they also collapsed into an invertebrate heap. So I took a leap of faith and layered them into the pan uncooked. They turned out perfectly.
To prepare the final dish, preheat the oven to 350°F. In a three quart baking dish spread a thin layer of Bechamel. Cover with overlapping noodles. Spread another layer of white sauce, then meat sauce, then more noodles. Repeat until top layer of noodles is arranged, then place a final layer of Bechamel. Since I'm not able to sprinkle with cheese as per the original recipe, I combined some panko, olive oil, and seasonings to cover the top.
Cover the baking dish lightly with foil, taking care not to let it touch the top of the lasagne. Bake 40 minutes, or until almost heated through. Remove the foil and bake another 10 minutes, or until hot in the center (test by inserting a knife – if it comes out very warm, the dish is ready). Turn off the oven, leave the door ajar and let the lasagne rest for about 10 minutes.

2009-02-05

Vegan Tuiles with Mango Lime Sorbet

"This month's challenge is brought to us by Karen of Bake My Day and Zorra of 1x umruehren bitte aka Kochtopf. They have chosen Tuiles from The Chocolate Book by Angélique Schmeink and Nougatine and Chocolate Tuiles from Michel Roux."
Despite the best of intentions, this is the latest I've ever posted a Daring Bakers challenge, hopefully before my membership becomes extinct! The road finally taken to eventually produce tuiles was, shall we say, complicated and overly ambitious.
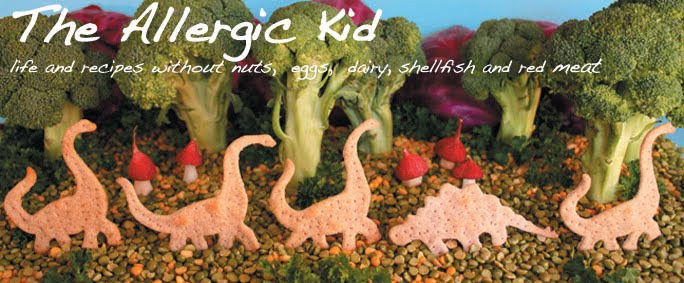
As you can see from this photo of one(!) of my stencils, I had hopelessly grand plans for a Jurassic panorama of tuiles, complete with flora and fauna. It might have worked if I had baked traditional tuiles, but the veganized version of Jurassic Park was not to be.
For my first attempt at baking the lovelies, I tried this recipe for Cinnamon Nutmeg Tuiles substituting Earth Balance for the butter. Disaster would be too kind a word for the outcome.
I next tried Vegan YumYum's recipe for tuiles, with far better results, but complicated designs were still out of reach. The only change I made to the batter was to use preground flax seed meal, instead of pulverizing whole flax seeds, since I don't have a grinder that hasn't been used to grind coffee. The flax meal left little flecks in the cookies, but I like the look of them.
Despite being led astray by Epicurious with the first tuile recipe, I made half a batch of this recipe for Mango Sorbet, ignoring the directions for serving in the mango skins. Since I don't have an ice cream maker, I simply whipped it up in my food processor, froze it, then whipped it up again. The sorbet was wonderfully creamy and simply delicious, and we will definitely be having it again, with or without the tuiles.

2008-12-28

A French Yule Log That Wasn't

I really love the Daring Bakers. They have pushed me to bake some amazing creations that I would have hesitated to attempt, even before compensating for my son's allergies. This month I've been so swamped by holidays and holiday baking, that I haven't even posted the cookies I've planned for months to share. (Or sent my cards out!) So I regretfully have passed on December's challenge.
Please check out what some of the other Daring Bakers have offered up this month, a French Yule Log by Flore from Florilege Gourmand, which was chosen by Hilda from Saffron and Blueberry and Marion from Il en Faut Peu Pour Etre Heureux, and I'll be back next month with a vengeance!

2008-12-01

Caramel Cake

I feel as if I am finally returning to the land of the living after spending last week first clouded in a head full of congestion, then sunk into a carbohydrate coma. So please forgive my late and somewhat abrupt Daring Bakers post for last month.
November's recipe was a Caramel Cake from Shuna Fish Lydon. It was chosen by Dolores of Culinary Curiosity, who shared hosting duties with Alex, better known as Brownie of Blondie and Brownie and Jenny of Foray into Food.

Caramel is one of my husband's favorite flavors, so I made the cake for his birthday earlier this month with substitutions for my son's allergies. The cake was nice, but as other Daring Bakers have noted, the frosting was extremely sweet. For the caramels on top of the cake I used a lovely dairy free recipe from Maggie of Dog Hill Kitchen. I made a half batch with one of my carefully hoarded clearance vanilla beans to flavor it and used cookie cutters for shapes to decorate the cake.
I'm afraid I only got a quick snap of the cake, instead of a real beauty shot, since I realized that I need to take more photos of the family and less of the food at events. So thank you to Dolores, Alex, and Jenny for a sweet challenge and happy birthday, honey!

2008-10-29

Peter Reinhart's Pizza

This month's savory Daring Baker challenge was hosted by Rosa of Rosa's Yummy Yums, sadly without Sherry of What Did You Eat, who had planned it with her, but passed away July 20th. Peter Reinhart's pizza recipe from The Bread Baker's Apprentice was chosen by Sherry, and Daring Bakers all over the world lifted a slice in her memory.
Homemade pizza is one of The Kid's absolute favorite foods, so I was eager to try a new recipe. Some of the directions were new to me, such as chilling the flour before use, but the crust did not disappoint. It was light and tender with a very slight sourdough tang. Unfortunately, I allowed the dough to overproof by an hour on it's final rise, so it was too loose and prone to tearing to attempt to toss, as the challenge required. (I have a five year old. Best laid baking plans have a way of combusting!) Dinner was late, and my husband barely managed to snap a few pics before the pizza was snarfed up.
On the first pizza, I spread Tofutti Garlic & Herb Better Than Cream Cheese, then covered it with a Chunky Tomato Vegetable Sauce and topped it with turkey sausage. This one was a huge hit with The Kid. The second pizza had a simple Basil & Marinated Artichoke Pesto topped with caramelized sweet onions. It may have looked like a green lawn covered with brown worms, but it tasted simply sublime.
Chunky Tomato Vegetable Sauce:
2 Tbs olive oil

1 sweet onion, chopped

4-6 mushrooms, sliced

1 small zucchini, thinly sliced

14.5 oz can diced tomatoes

1 tsp mixed Italian herbs

1/4 tsp garlic powder

kosher salt to taste

Heat olive oil over medium heat in a large skillet or fry pan. Saute onions until soft, then stir in mushrooms and zucchini. Stir regularly until vegetables reach desired tenderness, add tomatoes with liquid, and mix in seasonings.
This challenge was another wonderfully tasty lesson from the Daring Bakers, and I will be incorporating some of Peter Reinhart's techniques into my pizza routine. Many thanks to Rosa for a lovely recipe and remembrance.

2008-09-27

Lavash Crackers and Avocado Dip

To my surprise and delight, this month's Daring Bakers Challenge was dedicated to the dietary restricted bakers, those of us who muddle through the challenges vegan, gluten free, or with food allergies. To make the challenge even better, it was hosted by two of my very favorite bloggers, Natalie of Gluten A Go Go and Shelly of Musings from the Fishbowl. They chose a recipe for Lavash Crackers from Peter Reinhart's The Bread Bakers Apprentice, asked us to make a dip, gave us gluten free options, required that everything be vegan, and otherwise set us completely free to choose flavors and toppings.
I may have gotten a little carried away, so I'll refer you to the original recipe for instructions on how to make the crackers, and just list the ingredients I used for each of the four versions I made. The crackers did not take the full 15-20 minutes to bake, and all of these were done in 12-16 minutes. These are all half batches, which is what I generally make when I'm experimenting, so I'll definitely double the quantity when I'm making them again, except for the water/baking soda mixture for the first cracker. The Kid will also probably request that I use dinosaur cookie cutters, instead of these shapes!
There's a commercial pretzel cracker on the market that I really enjoy, but my son is unable to eat due to his food allergies. So the first cracker I made was a Pretzel Cracker.
  • 3/4 C bread flour
  • 1/8 tsp salt
  • 1/4 tsp instant yeast
  • 1 1/2 tsp brown sugar
  • 1 1/2 tsp canola oil
  • 1/4 C water at room temperature
  • 1/4 C water + 1/2 tsp baking soda
  • kosher salt for sprinkling
The only variation in technique for this cracker (the rectangular one), was that I used a pastry brush to spread the water and baking soda mixture onto the crackers instead of misting them with water. This was the flakiest cracker with the closest to a commercial taste and texture.
The next cracker I attempted was a Corn Cracker (the round one). It would made an excellent healthy substitute for a deep fried corn chip.
  • 1/2 C bread flour
  • 1/4 C corn meal
  • 1/4 tsp paprika
  • 1/8 tsp garlic powder
  • 1/8 tsp salt
  • 1/4 tsp instant yeast
  • 1 1/2 tsp granulated sugar
  • 1 1/2 tsp canola oil
  • 1/4 C water at room temperature
  • kosher salt and additional paprika for sprinkling
I'm always amazed by what the gluten free Daring Bakers are able to accomplish without wheat. Rice crackers are some of my favorite, so I decided to be daring and try making Sesame Rice Crackers (the flower shaped ones). I had a little trouble with the rise, and they are somewhat hard, but the taste makes them worth trying again.
  • 3/4 C white rice flour
  • 1/2 tsp xanthan gum
  • 1/4 tsp ginger powder
  • 1/8 tsp garlic powder
  • 1/8 tsp salt
  • 1/4 tsp instant yeast
  • 1 1/2 tsp granulated sugar
  • 1 1/2 tsp sesame oil
  • 1/4 C + 1 Tbs water at room temperature
  • toasted sesame seeds for sprinkling
Next, I decided to make a sweet version, a Maple Wheat Cracker. This was probably the least attractive, but best tasting of all four variations.
  • 1/2 C whole wheat flour
  • 1/4 C bread flour
  • 1/4 tsp cinnamon
  • 1/8 tsp salt
  • 1/4 tsp instant yeast
  • 2 Tbs maple syrup
  • 1 1/2 tsp canola oil
  • 1/4 C water at room temperature
  • turbinado sugar for sprinkling
Finally, I made an avocado dip to accompany the savory crackers. It wasn't a hard choice. Just so you understand how I feel about avocado, if forced to, I'm not sure I could choose between it and chocolate. This dip is simple, but unlike a spicy guacamole, the taste of the creamy fruit shines through.
  • 2 ripe Haas avocados
  • 2 tsp lime juice
  • pinch of garlic powder
  • kosher salt to taste
Peel and quarter the avocados and place in a medium bowl. Add the other ingredients and mash together with a potato masher. Serve immediately.

I loved how thrifty and practical these crackers were, while still giving me so much room to experiment and be creative. Many, many thanks to both Shelly and Natalie for such a wonderful challenge!

2008-07-30

Very Daring Almost Gateau


When I saw this month's Daring Baker challenge recipe, Filbert Gateau with Praline Buttercream from Great Cakes by Carol Walter I almost decided to sit this one out. The cake chosen by the host, Chris of Mele Cott, sounded delicious, but the idea of substituting for all those eggs, nuts, and liquors was, well, challenging.
The original recipe calls for ground hazelnuts, 7 egg yolks, 5 egg whites, and 1/4 C of clarified butter. The first time I tried to make the cake, I used oat flour plus a few tablespoons flax seed meal to substitute for the nut, tofu to substitute for the egg, dairy free margarine for the butter, and added lemon juice and baking soda to get some lift. I've had some bad experiences with tofu in the past, and sadly, this first attempt to modify the recipe did nothing to change my opinion of the much maligned soy product.
The second attempt, which you see here, had Ener-G egg replacer instead of tofu and did not include the lemon juice and baking soda. The cake itself tasted amazing, virtually identical to a nut based cake, but had not risen at all. I made do with two layers instead of three, and put the rest of the cake together, using one of my own buttercream recipes with strawberry preserves instead of cherry and adding a thin layer of strawberries between the cake layers, since the poor thing was so short!
The cake itself wasn't a great success, but as usual I learned some new techniques and now have a really great substitute for nut meal in recipes. Be sure to check out all the other Daring Bakers, so you can see what the cake is supposed to look like!

2008-07-05

Belated Danish Braid

This post is long overdue, so my apologies to all the Daring Bakers who have stopped by to check on my pastry, and who I've also neglected to visit. (As my mom said, "That Danish Braid has been proofing all week!") First, thanks to Kelly of Sass & Veracity and Ben of What's Cookin'? for setting such a great challenge. (Yes, that's the same Ben, who was nice enough to send us our beloved Pop-A-Lot.) Due to his allergies my son had never eaten any kind of pastry, so I've contemplated trying to adapt a recipe, but hadn't been brave enough to do so. Kelly and Ben chose Sherry Yard's Danish Braid recipe with its fragrant, spiced dough, which was helpful when baking something that usually depends on butter for its flavor. (The original is in The Secrets of Baking.)
Rather than post the original recipe and my adaptation, I'll send you to Kelly for the original version, and just give you the changes I made to it. For my attempt I halved the recipe, which is why the quantities of the ingredients are so different.
For the dough (Detrempe):
1 packet active dry yeast

1/4 C coconut milk

2 Tbs granulated sugar

Zest of 1 orange, finely grated

1/2 tsp ground cardamom

1 1/2 tsp vanilla extract

1/2 C fresh orange juice

1 1/2 C + 2 Tbs all-purpose flour

1/2 tsp salt
For the butter(less) block
(Beurrage):
1/2 C coconut oil

2 Tbs all-purpose flour
The original recipe called for two eggs. I left the yeast at a full packet, rather than halving it to compensate for any rise that would be lost. Since the coconut oil provides plenty of fat, I simply increased the amount of orange juice to compensate for the liquid removed from the recipe. It seemed to work well.
This was the first time I've used coconut oil for baking. I chilled it, as the butter in the original is, and quickly discovered that the expensive stuff becomes extremely hard in the refrigerator. I had a terrible time measuring it correctly. As difficult as it was to get out of the container, the oil came together beautifully with the flour and spread perfectly. If I use coconut oil for this technique again, I'll measure it warm, then chill just the portion I'll be using.
Forgetting that I was making half a batch, I rolled the dough out too thin and had a little leakage when folding the dough for the first time. I gave the dough one additional fold in half after the first turn and didn't have any other problems with it.
After resting overnight, I rolled the dough out to its final dimensions to match my cookie sheet rather than the recipe. (I twirled up the scraps of dough, sprinkled them with some sugar, and baked them into some yummy little breakfast treats.) I'll confess right now, I used a ruler to get these even strips!
For the filling, I had planned to use two mangoes, but one of them had mysteriously disappeared from my kitchen. So I cooked up the remaining mango with an eight ounce can of crushed pineapple to make up for the missing fruit. The filling didn't look very appetizing, but it tasted amazing.
The braid came together easily, but I realized later after seeing some of the other DB posts that I should have planned better to close the ends of the braid. I painted it with some of the leftover coconut milk and sprinkled it with turbinado sugar, then let it proof. The sugar should have waited until it was ready to bake, since the crystals tended to dissolve in the coconut milk
I was very pleased with how the braid turned out, and am actually looking forward to making more laminated dough in the future! Thanks again to Kelly and Ben for a great challenge.

2008-06-29

Still Proofing...

It turns out I'm an alternative, procrastinating, Daring Baker. (Will need to update my profile at the forum, someday.) Here's a tease of my tropical Danish Braid: I used coconut oil and coconut milk as replacements for butter and milk in the dough. The filling is mango and pineapple. Instead of an egg wash, I painted it with more coconut milk and sprinkled it with turbinado sugar. I'll let you all know how it turns out and post the complete recipe this evening after I recover from the birthday party we're going to today!

2008-05-28

Citrus Opera Cake Tragedy


I almost didn't post this month's multi-layered Daring Baker challenge: Dorie Greenspan's Opera Cake, which was thoughtfully dedicated to Barbara of Winos and Foodies by Ivonne of Cream Puffs in Venice, Lis of La Mia Cucina, Fran of Apple Peaches Pumpkin Pie, and Shea of Whiskful. The first attempt I made at modifying the recipe to make a raspberry jaconde produced a cake that resembled fruit leather. My end of the month schedule was so hectic, including a full blown family reunion, that I didn't think I'd have time to try it again. Today, the first day back at school after the Memorial Day holiday, I received a call from the school to tell me The Kid had had an allergic reaction. (He's doing fine now. I'll post more on that later.) After all the stress and chaos of the day, I found myself wandering back to the kitchen this evening to try the opera cake again.
For the joconde, which was the cause of my original disaster, I went back to the drawing board. The original recipe used almond meal, for which other Daring Bakers had substituted oat flour. I used that again with powdered sugar, baking powder and soda, soy milk, lemon juice, and lemon zest. The result resembled a poorly executed corn bread. I may try to replicate a sponge cake again, but will most likely use cake flour, since this version was far too rustic!

For the other components of the cake, I made a lime syrup, an orange buttercream, skipped the mousse, and made a drippy pineapple glaze. (I wanted to make a glaze out of coconut milk, but discovered I'd used the last of it to make two Coconut Key Lime Pies for the family reunion!)
If nothing else, the opera cake was an effective cure for overconfidence in the kitchen, as well as a reminder that I learn more from the experiments that don't work than from the ones that do.

2008-04-27

Jill O'Connor's Cheesecake Pops

It's the end of the month and time for the reveal of another Daring Bakers Challenge! (We have officially outgrown Blogger, so be sure to go check out the new Bat Cave.) These goodies really did emerge from the chaos that has been my kitchen this month. For two days, I saw only the lower half of my husband sticking out from underneath our kitchen sink. Eventually he gave up on the old faucet and we have a lovely new one (and I have a newfound respect for both my husband's mechanical and linguistic abilities), but I've yet to get everything put away and cleaned up.
The recipe this month was provided by Elle of Feeding My Enthusiasm and Deborah of Taste and Tell. The original really did present a challenge, requiring substitutions for cream cheese, eggs, heavy creamer, and potentially unsafe chocolate. My mad scientist plans for experimenting with multiple substitutions were derailed, but I did manage to make a mostly successful version with Tofutti Better Than Cream Cheese and Ener-G Egg Replacer and a less successful attempt with the Tofutti and mashed banana. For both versions I used Silk Soy Creamer to replace the heavy cream and Enjoy Life Chocolate Chips for the chocolate coating. Both of them required an additional twenty minutes bake time. Although the banana version browned on top, it never did set up properly.
I was less nervous about my radical substitutions than I was about melting chocolate in a double boiler. It was something that I tried once before with really disastrous results. That was probably the most successful part of this Daring Bakers Challenge: overcoming my irrational fear of melting chocolate! (Twelve hours housebound to nurse Julia Child's classic French Bread? No problem! Chocolate chips in a bowl? Eek!) Since the banana pops never firmed up enough to survive a chocolate dip, I ended up with excess melted chocolate. (Horrors.) I remembered a post from Allergy Foodies about dipping pretzels in chocolate and ended up with a bonus treat for The Kid's lunch box. The official verdict on the Cheesecake Pops from my pre-school critic was "They have sprinkles!" and "Yummy!"

2008-03-30

Dorie Greenspan's Perfect Party Cake

This month's Daring Bakers challenge is Dorie Greenspan's "Perfect Party Cake" from Baking from My Home to Yours. It was thoughtfully chosen by Morven of Food Art and Random Thoughts to allow for a great deal of personal expression in flavor and decoration. The flavors as written, lemon and raspberry, sounded so good, that they were the one thing I didn't change for my egg and milk free adaptation. Dorie Greenspan has many justifiably dedicated fans, but I've never attempted any of her recipes before.
The substitutions for the cake were very straightforward: lemon juice + soy milk for the buttermilk, Ener-G Egg Replacer for the egg whites, and Earth Balance Buttery Sticks for the butter. Unfortunately, the cake didn't rise very well at all, and I wasn't able to slice my two cakes into additional layers.
After some experimentation, I was able to come up with a good substitute for the eggs in the buttercream, which was luscious and not too sweet. (See my previous post.) Even better, I had some of my mom's homemade raspberry preserves to use in the filling for the center.
Although the lack of rise was disappointing, the crumb was amazing, softly melting in my mouth. The lemon flavor was a little overpowering, somewhat out of balance with the raspberry, but then again, I was missing two layers of it! I'm afraid I used up all my creativity on the buttercream, so you'll need to go see what everyone else did to decorate some truly beautiful cakes!

Adapting Dorie Greenspan's Buttercream

I have a reliable powdered sugar recipe for buttercream frosting, but I wanted to stay as close as possible to Dorie Greenspan's original directions for the March Daring Bakers Challenge. I decided to try several substitutions for the egg, so I made three 1/4 batches using corn starch, Ener-G Egg Replacer, and a vegan gelatin. You can see the results above.
The corn starch and egg replacer made glazes instead of frosting. The gelatin started out looking like other two, but after having the margarine added and being whipped, its structure and texture changed completely. The resulting frosting is silky smooth and spreadable with a slippery mouth feel. After tasting it, my husband compared it to a meringue. Success!
Update: Sorry it's taken me so long to get the recipe up!
Ingredients:
1 C sugar

1/2 C boiling water + 10g packet of vegan gelatin

3 sticks (12 oz) slightly softened dairy free margarine, not all the way to room temp
(I prefer Earth Balance Buttery Sticks)
1/4 C fresh lemon juice

1 tsp vanilla extract

Dorie's original recipe calls for whisking egg whites together with the sugar in a double boiler. Since the gelatin, which replaces the egg whites, is being mixed directly with boiling water, the gentle method used on the egg whites is unnecessary. One word of caution: if there are any lumps in the gelatin, be sure to pound or sift them out, or there will be lumps in the frosting.
Mix the gelatin and boiling water, then stir in the sugar, making sure it is completely dissolved. (Don't be put off by the appearance. Yes, it looks like a bowl full of snot, but persevere anyway!) Using a hand mixer or the whisk attachment on a stand mixer, beat the mixture on medium speed until cool, about five minutes. Change to a paddle attachment if using stand mixer, and beat in the margarine one stick at a time until smooth. Increase the mixture speed to medium high and beat until thick and very smooth, about six to ten minutes, or longer if necessary. This is when you will see the dramatic change in the texture . Reduce speed to medium and gradually add the lemon juice and vanilla extract. Keep the resulting frosting covered and refrigerate any extra. It will handle much better at room temperature.

2008-02-29

Julia Child's French Bread

I really loved my first Daring Baker challenge. Right now, I'm down with the flu, though, so I'll just put up a picture and do the full post later.
Update: I can't remember the last time a bug hit me, or the rest of my household, this hard. If you are sick this flu season, don't be stubborn, head into a doctor's office and take care of yourself. As for the bread...I started writing this post the night before the scheduled DB reveal, and am just finishing it now....


It's not the hubris, it's the humidity.
This is my first Daring Bakers challenge, and I was so very excited (and relieved) when I found out what this month's recipe is. There was nothing to adjust, compensate, remove, or replace, except possibly my attitude, because I have something to confess. I am a serial dough abuser. I frequently make pizza dough, which I hurry along with a heating pad, or toss in the fridge until I'm ready to use it. Yes, that organism called yeast has its own life cycle, and better bread will result if it's understood and respected. Of course, my Kid is also on a schedule, and he wants dinner NOW. This time, though, this time the bread and the process was for me. I printed out all 15 pages of directions, highlighted, underlined, took notes, procured equipment, and tried to figure out how on earth I was going to find 7 to 9 hours to make bread!
The recipe, Pain Francais (French Bread) from Mastering the Art of French Cooking: Volume Two by Julia Child and Simone Beck, was selected by Breadchick of Sourdough and Sara of I Like To Cook. Breadchick was also kind enough to include the entire recipe, along with the invaluable notes that she and Sara provided, in her post.
I followed the recipe to the letter. I thought that, and my previous experience with yeast breads, would be enough to sail me through the challenge. Then I started on Step 1: The Dough Mixture. Despite measuring as precisely as possible, the dough was far, far too wet and sticky. I added at least half a cup of additional flour, probably closer to a full cup. Although I reminded myself that my frame of reference is pizza dough, which is extremely stiff, I'm sure I went too far, and ended up with a far stiffer dough than is ideal for French Bread. My best guess is that living in such a humid place, Florida, may have caused my flour to have already absorbed considerable moisture from the air.
The next problem I ran into was also geographical. Despite blasting the air conditioner all day, I just couldn't get the temperature in my home below 74°. (Don't hate me.) So I placed the dough container in a bowl of water and kept chucking ice cubes into it to make sure I had a nice, slow, first rise.
It paid off. After the first rise my dough had the softest, silkiest texture I've ever laid my hands on. Forget babies' bottoms. I've never fondled an infant's rear end the way I felt up that dough. I didn't want to put it down for the second rise!


Then I ran into my next problem: bedtime. The Kid did not want to go to sleep that night, and I ended up letting the second rise go on far too long. The dough went beyond triple it's original size, and ended up with a lopsided dome with large gas bubbles. I regrouped, and formed three round loaves. (I decided against baguettes so that I could use my pizza stone to bake the bread.) I had a very difficult time folding the dough, so I suspect that it was indeed too stiff from the additional flour. The final rise was somewhat disappointing, since the three loaves didn't really gain much in size. I hoped for some good oven spring, since I was working the steam angles as hard as I could with a sacrificial cookie tray heating up water and getting more ice cubes thrown into it. (I'm sensing a trend...)

Success! Sort of. The first two loaves I baked on the pizza stone sprang...so high that the tops got too close to the top of the oven and burnt. I moved the oven rack back down from the top third of the oven, where I had placed it according to the directions, and baked the final loaf. It was beautiful. The last one was pretty, but all three tasted amazing. I'm hooked. Hooked on the Daring Bakers, and hooked on baking more bread. Thanks so much to Breadchick and Sara for setting such a great challenge and giving all the help needed to make it doable, and to the Daring Bakers for being the nicest, most welcoming kitchen junkies anyone could hope to meet!